Sunday, December 1, 2013

VM Import: “Unsupported and/or invalid disk type 7″ errors….

VM Import: “Unsupported and/or invalid disk type 7″ errors….

Came across another issue with importing and moving a VM into vSphere. The VM was created in Workstation 8 and was to be imported into vSphere to be used as a development VM.
Uploading the VM to the LUN worked fine, as did importing it to the vCenter Inventory. However, powering-on the VM resulted in the SCSI error type 7 message in vCenter.

Solution:
This can happen when importing a VM into vSphere, either from a backup or from another vSphere version. The solution is to re-import the source disk producing the error as ‘zeroedthick’ format.
Method:
1. Ensure you have SSH access to your ESXi server hosting your VM. (Host > Configuration > Software > Security Profile > Services > Properties > SSH = Running).
2. Use Putty to SSH to your ESXi host. Authenticate as the root user.
3. Move to the VM folder:
/vmfs/volumes/<datastore>/<vm-folder>
….where <datastore> is your LUN or NFS share and <vm-folder> is your VM container folder.
4. Use vmkfstools to convert the disk to zeroedthick:
vmkfstools -i mydisk.vmdk -d zeroedthick mydisk1.vmdk
5. Now go back to vCenter and browse the datastore hosting the VM. Both ‘mydisk.vmdk’ and ‘mydisk1.vmdk’ should be present.
(Optional: Download the original disk (if practical) to preserve in case of further issue.)
6. Remove mydisk.vmdk from the VM folder.
7. Rename ‘mydisk1.vmdk’ to ‘mydisk.vmdk’.
8. Power-on the VM and check for further errors in vCenter.


Owner: http://www.vspecialist.co.uk/vm-import-unsupported-andor-invalid-disk-type-7-errors/

Monday, November 25, 2013

How to Install Mysql-Phpmyadmin-Import-Export-Database


How to install/configure MySQL Database


Yum install mysql* mysql-* php* php-*

Post installation:


  1. Admin user id: root

    Default password: blank


The first task is to assign a password:


     # mysqladmin  -u root password 'new-password'


How to download/install phpMyAdmin 2.2.1:
  1. cd  /var/www/html
  2. Wget http://garr.dl.sourceforge.net/project/phpmyadmin/phpMyAdmin/4.0.9/phpMyAdmin-4.0.9-all-languages.tar.gz
  3. Untar the distribution :
tar xzvf  phpMyAdmin-4.0.9-all-languages.tar.gz
mv phpMyAdmin-4.0.9-all-languages.tar.gz phpMyAdmin
chmod –R 775 phpMyadmin
  1. ( Open the file config.inc.php in your favorite editor and change the values for host, user, and password to fit your environment. Read Documentation.txt file for the details.)
./config.inc.php
  1. Open the file www.your-host.com/phpMyAdmin/index.php in your browser.


MySQL Import File / Database Command

If database customer does not exists, first create it and than import it as follows:

$ mysql -u root -p -e 'create database customer;'
OR
$ mysql -u root -p customer < /var/www/html/device/customer.sql (backup data location)

Creating A Backup
The mysqldump command is used to create textfile “dumps” of databases managed by MySQL. These dumps are just files with all the SQL commands needed to recreate the database from scratch.
If you want to back up a single database, you merely create the dump and send the output into a file, like so:

   mysqldump –u root –p database_name > /location/database_name.sql

Multiple databases can be backed up at the same time:
   mysqldump --databases database_one database_two > two_databases.sql

It is also simple to back up all of the databases on a server:
  mysqldump --all-databases > all_databases.sql

Restoring a Backup

Since the dump files are just SQL commands, you can restore the database backup by telling mysql to run the commands in it and put the data into the proper database.
   mysql database_name < database_name.sql

If you are trying to restore a single database from dump of all the databases, you have to let mysql know like this:
   mysql --one-database database_name < all_databases.sql


Thursday, September 19, 2013

Options - qmailmrtg7

Options - qmailmrtg7

This is a great tool for graphing your mail server's activity.
  • Compile:
cd /download/
mkdir /var/www/html/qmailmrtg

tar -xzf tar/qmailmrtg7-4.2.tar.gz
cd qmailmrtg7-4.2
patch -p0 < ../tar/qmailmrtg7-4.2-cfg.patch
make
make install
  • Configure:
# Edit qmail.mrtg.cfg and change all instances of FQDN to 'www.example.com' and WorkDir to /var/www/html/qmailmrtg

vi qmail.mrtg.cfg

:%s/\/var\/www\/html\/qmailmrtg/\/var\/www\/html\/qmailmrtg/

:%s/FQDN/www.example.com/
  • Install:
cp qmail.mrtg.cfg /etc/
indexmaker --section=title /etc/qmail.mrtg.cfg > /var/www/html/qmailmrtg/index.html

# now run mrtg 3 times to get rid of initial cron errors
env LANG=C mrtg /etc/qmail.mrtg.cfg
  • Execute:
o    Add the following line to your crontab
0-55/5 * * * * env LANG=C /usr/bin/mrtg /etc/qmail.mrtg.cfg > /dev/null
  • Test:
Point your browser to the following address;
http://10.1.1.161//qmailmrtg/


Tuesday, September 17, 2013

Disable root ssh access

Disable root ssh access by editing
#########################

 
vim /etc/ssh/sshd_config to contain:
PermitRootLogin no

Saturday, September 7, 2013

Tcpserver: fatal: unable to bind: address already used


@40000000522b62012f1e4374 tcpserver: fatal: unable to bind: address already used
@40000000522b62023056ea84 tcpserver: fatal: unable to bind: address already used
@40000000522b620331e86bac tcpserver: fatal: unable to bind: address already used
@40000000522b620432e4f034 tcpserver: fatal: unable to bind: address already used
@40000000522b62053451073c tcpserver: fatal: unable to bind: address already used
@40000000522b620635b05ca4 tcpserver: fatal: unable to bind: address already used
@40000000522b6207374953f4 tcpserver: fatal: unable to bind: address already used
@40000000522b620838caa0ac tcpserver: fatal: unable to bind: address already used
@40000000522b62093a3bb50c tcpserver: fatal: unable to bind: address already used


qmailctl stop
nmap localhost
show this,  should be port 25 is running, then stop it.
and start
qmailctl start

tail -f /var/log/qmail/qmail-smtpd/current

Tuesday, June 11, 2013

How to remove Windows 7 is not genuine

How to remove Windows 7 is not genuine 0xC004F200

Dear all,
First time your computer is set up from the computer shop and it is working properly. The windows they installed for you is not a genuine version. After installing Windows update KB971033.
Every time you start pc you always see the annoying screen.

  When you right click on My Computer you see as below. "You must activate today..." 
****SOLUTION****
Step 1: Disconnect internet
Step 2: Go to Control Panel > Uninstall a program > Click View installed updates
Under Microsoft Windows > Find KB971033 > and Uninstall this update. 
Step 3: Turn off Windows Updates
Go to Control Panel> Windows update > Change setting and select"Never check for updates" > OK
Step 4: Rearm Windows
Click Start > Type "cmd" > Right-click on cmd > Choose Run as administrator 
Type in > slmgr -rearm then reboot your pc. You're done.


NOTE: After restarting the pc you'll see Windows is activated. By right-clicking on My Computer and choose Properties. Make sure your computer is not "Turn on Windows update" by verifying Step 3. 

Thursday, May 30, 2013

Windows Picture and Fax Viewer Problem ( Windows XP )

Solution to Error loading c:\windows\system32\shimgvw.dll Problem


The problem was faced by one our readers who was troubled with the Windows Picture and Fax Viewer that whenever he opened a picture file like .jpg, .bmp or .png image there comes an error message saying
Error loading c:\windows\system32\shimgvw.dll
Invalid access to memory location

Steps to fix the problem:
1.    Locate the shimgvw.dll file in C:\WINDOWS\system32\ folder and rename it to old_shimgvw.dll or something similar and move it to another folder.
2.    Then we need to place the new file there, either download it from here or use the XP CD.
3.    If copying from XP CD then make use of this command (type the command in cmd), EXPAND X:\i386\SHIMGVW.DL_ %WINDIR%\SYSTEM32\SHIMGVW.DLL where X is the CD Drive letter.
4.    When the file has been copied; place the file in C:\WINDOWS\system32\ folder.
5.    Now we need to register the fresh copy once again and the command for that is (enter the command in the Run box)
regsvr32 shimgvw.dll
regsvr32 /i shimgvw.dll

If the dialog saying “DllRegisterServer in SHIMGVW.DLL succeeded” comes up, that means the problem is fixed.

Sunday, May 5, 2013

How To Disable Password Complexity on Active Directory (Windows Server 2008)

How To Disable Password Complexity on Active Directory (Windows Server 2008)

Turning of this function is not as easy as Windows Server 2003. I'll brief to guide you have to conduct in no time.


Share Internet Connection With WiFi

Windows 7

You can create an ad-hoc network or download Connectify software into your machine. In my case, I am using Google Nexus One (rooted) with 3G network. My Laptop connect to my mobile network then share to the others through Connectify. Just follow the Easy Setup Wizard to configure. 


If you are using another different OS (XP, Linux, Mac) without supporting of Connectify, you can create ad-hoc network for sharing (just google it) or using RJ45 cable.

There is another option which I am using on my desktop. I am using a Desktop in my house and I want every times it turn on, It will automatically open the WiFi sharing for my house. I can buy a WiFi modem or another WiFi usb. They both work well. My recommendation is a Ralink USB WiFi with Ralink ultility to turn Usb into Access Point. 

Tuesday, April 30, 2013

Install Printer Via IP Address ( Network Printer )

Windows 7: Install Printer Via IP Address

Install a printer in Windows 7 using an IP address. 
1. Click Start and type print in the search box. Click Devices and Printers.


2. Select Add a printer.
3. Select Add a Network, Wireless, or a Bluetooth Printer.


4. The printer may appear in the box. If so, select it. If not click The Printer That I Want Isn’t Listed.

5. Select Add a printer using a TCP/IP address or hostname. Click Next.


. Select TCP/IP Device in the Device type list.
7. Type the hostname or the IP address of the printer. Click Next.


8. Windows 7 should find the printer if the printer is on and configured correctly. You may have to specify more information. If prompted, Select the type of network adapter installed in the printer in the Device Type drop-down list. You can also click Custom to specify custom settings for the network printer. Click Next.

Finish

Wednesday, April 24, 2013

Cisco vpn client minimized to taskbar

The problem can be found in the file vpnclient.ini,
"C:\Program Files\Cisco Systems\VPN Client".

There are probably som really high values in the
logwindX =0
and
logwindowy=0 values
Just delete these lines and start the client again.

Block a website in local PC

How to block a website in local PC

The location of the hosts file depends on your operation system.
Windows XP, Vista and Windows 7 C:\WINDOWS\system32\drivers\etc\hosts
Windows 2000  C:\WINNT\system32\drivers\etc\hosts

Note! Make a backup of the hosts file and put it somewhere safe, in case you mess up.
1. Open the hosts file using Notepad or other plain text editor.
2. Find the line 127.0.0.1 localhost
3. To block, for example, the website youtube.com, add this text under 127.0.0.1 localhost:
   127.0.0.1 youtube.com

4. Save and close the Hosts file.
5. Reboot your computer to apply the changes.
6. Try to open www.youtube.com into a browser.


Monday, April 22, 2013

share an internet connection on LAN


Now you have to follow this steps:
1: you must have one system with 2 LAN card

2: plug the internet provider jack to one of them

3: plug another Lan cod(cross) to another port of the system to the switch / hubs in point(may be any one of the corner points of the device)

4:now check all the device are working or not
......................................…
if no then then fix it and if yes then:

steps:
1: go to my network places , select view network connections from the side bar.........

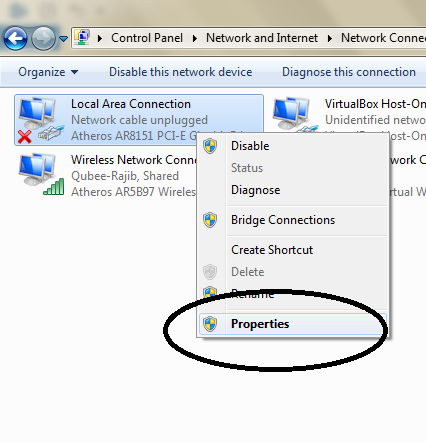
2: select the network connection which is connected to the LAN or hub and go to its property by rightclicking it

3: go to tcp/ip properties fron it and select advance tab

4: their you find Internet Connection Sharing check boxes , select Allow other network users to connect through this computer's Internet connection

5.You can enable or disable the allowing of other users to control the connection—users don't need to be able to control the connection to use it.

6.Under Internet Connection Firewall, select the Protect my computer and network by limiting or preventing access to this computer from the Internet check box for this network card, unless you have another firewall between the computer and the Internet. This is very important.

7.Click OK, and Internet Connection Sharing will be enabled.

Note: You must have administrative rights to enable ICS. After enabling ICS, verify that Internet connectivity is still functional on the host computer before testing the client computers. Remember to leave the host computer on all the time or turn it on before the other networked computers, so the client computers can request an IP address from the host.


\


How to Share a Printer Over a Local LAN.

How to Share a Printer Over  a Local LAN.

Click the Start menu, choose Network, and click the Network and Sharing Center button along the top.


 Go Control Panle

 Network & sharing

 change advanced sharing


then do this and save. now install printer which i want to share. when printer install is done. 


then go to start click device and printer , now right chick your desire printer, select printer properties 


 select share tab, mark share and give a name. then click ok.


Printer sharing is done.
Connect to the printer with all the other computers in the network that you need to use the printer.

fast go to another PC's start Button,
then run.

 type your printer connected pc's IP address
Such as.
\\192.168.3.13


Then Double click the printer icon and its installed.


Note:
You must insure that all pc are connected in same network. such as (192.168.3....) 


and Enjoy .
thanks rajib